
Introduction
![]()
Qiskit has fascinated me for a couple years at this point. It was my first hands-on quantum computing introduction bringing to fruition my 18 year old past-self’s dreams of jumping into a quantum world. While the last few years have been mostly spent understanding how to work with Qiskit by going through the textbook & tutorials, participating in the various quantum challenges, and generally working with Qiskit as an “end user”, it was only recently that I started exploring the other side of the equation - contributing to the community.
“Open-Source Quantum Development” it even says it right in the title. If you look at Qiskit’s contributor team it ends up representing only a fraction of the people who contribute to the various Qiskit repositories. Not all contributions are equal, but opening the ability for the community to give back to the projects allows for more diverse opinions, approaches, another set of eyes to do quality-assurance, and even tutorials that cover newly released Qiskit components.
From the first days exploring Qiskit I knew I wanted to eventually contribute back to the community. While I don’t have any formal Quantum Computing or Physics training, I do come from a Computer Science background, and I am familiar enough with the software development lifecycle process. As I found out recently, this was enough to get started down my open-source quantum contribution journey. Hopefully posts like this inspire more people to take stock of what they can bring to the table, especially those who may not otherwise think they could contribute meaningfully.
The journey of a thousand miles begins with a single step
Why Contribute Now?
So what kicked-off my journey to contributing back to the community? There were two main triggers. The first was the announcement of the upcoming new round of 2022 Qiskit Advocate applications. In addition to participation in Qiskit events as well as articles & writeups, code contributions fall across the various application tiers. The second was the result of running into an issue myself while building qiskit-aer v11.0. After reading the recent announcement I decided to build the latest release myself and start experimenting (expect another article covering that topic more directly). While going through the build process I ran into several issues, and ultimately found that I was using an outdated build document. How did I find this you may ask? There was an issue 1509 raised on the qiskit-aer repository that pointed out the discrepancy. Paying it forward and hoping to prevent having others run into the same issues I went ahead and implemented the fix.
Quick Workflow Overview
Issue, Commit, Pull Request, Merge? If any of these terms are confusing to you Github provides an interactive 60 minute course covering the basics of how to create, use, and contribute to code repositories in Github.
For the context of my initial contributions we can use the following diagram to understand the approach.
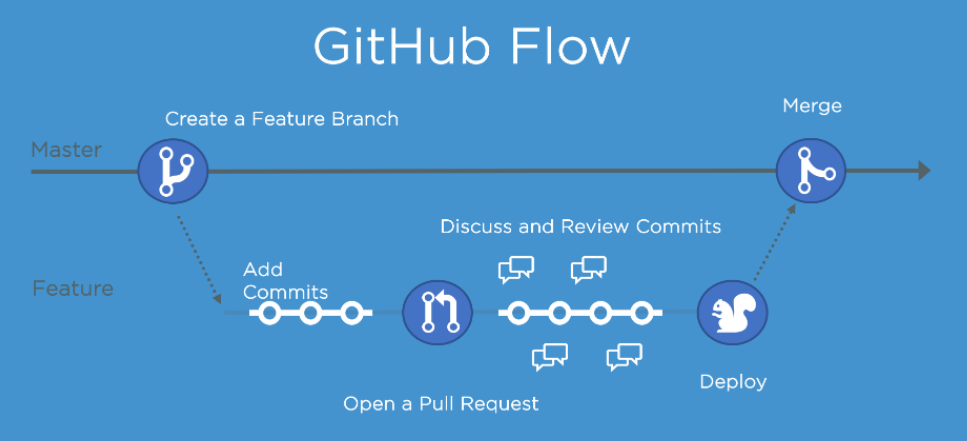
The steps can be broken down to the following steps:
- Fork my own copy of the Qiskit repository where I will contribute
- Create the feature/bugfix branch on my local copy
- Make the changes I want to introduce
- Commit the changes back to my personal repository
- Open a pull request to the main Qiskit project to bring in my changes
- Review, successful checks, and approval
- Contributions are merged
#profit
This may seem complicated, but as we go the steps you will hopefully agree that it ends up quite intuitive once you’ve seen it in action.
Fork, Branch, Clone, Commit
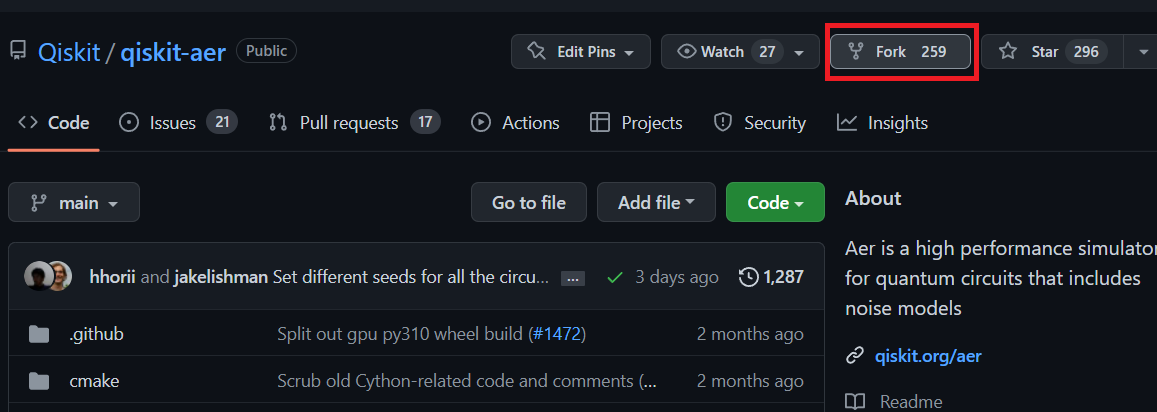
The first step is to create our local version of the repository by forking Qiskit’s repo.
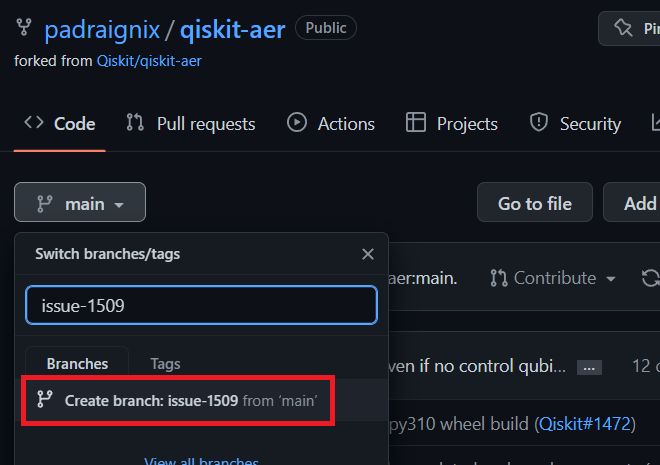
Once you have your own codebase, create a branch you will work with.
Great, now we are all set to make the changes. I use Github Desktop in this case, however there are many ways to get a copy of the branch on your local machine.

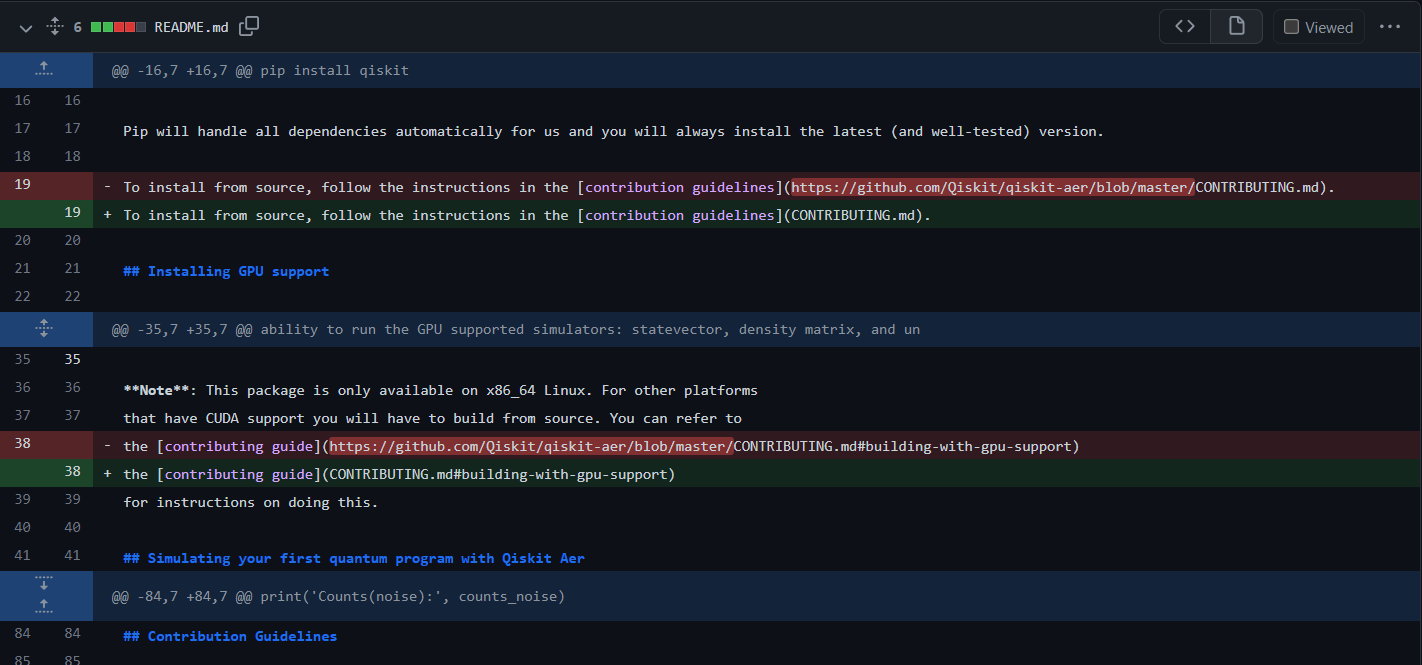
I made the changes using Visual Code Studio, then commit them back into my branch. You can even see the differences visually between the previous codebase and new changes.
Pull Request 1517
At this point we have the changes we want to introduce back to the main Qiskit repository in our forked repo. So how do we get those changes over? It makes sense that people cannot just push their own code directly into Qiskit’s repo without review or approval. We need to make sure that any proposed changes are logical and don’t break any existing functionality. This is what pull requests allow anyone to do - raise a request to have their changes reviewed, approved, and ultimately merged back into the main repo.
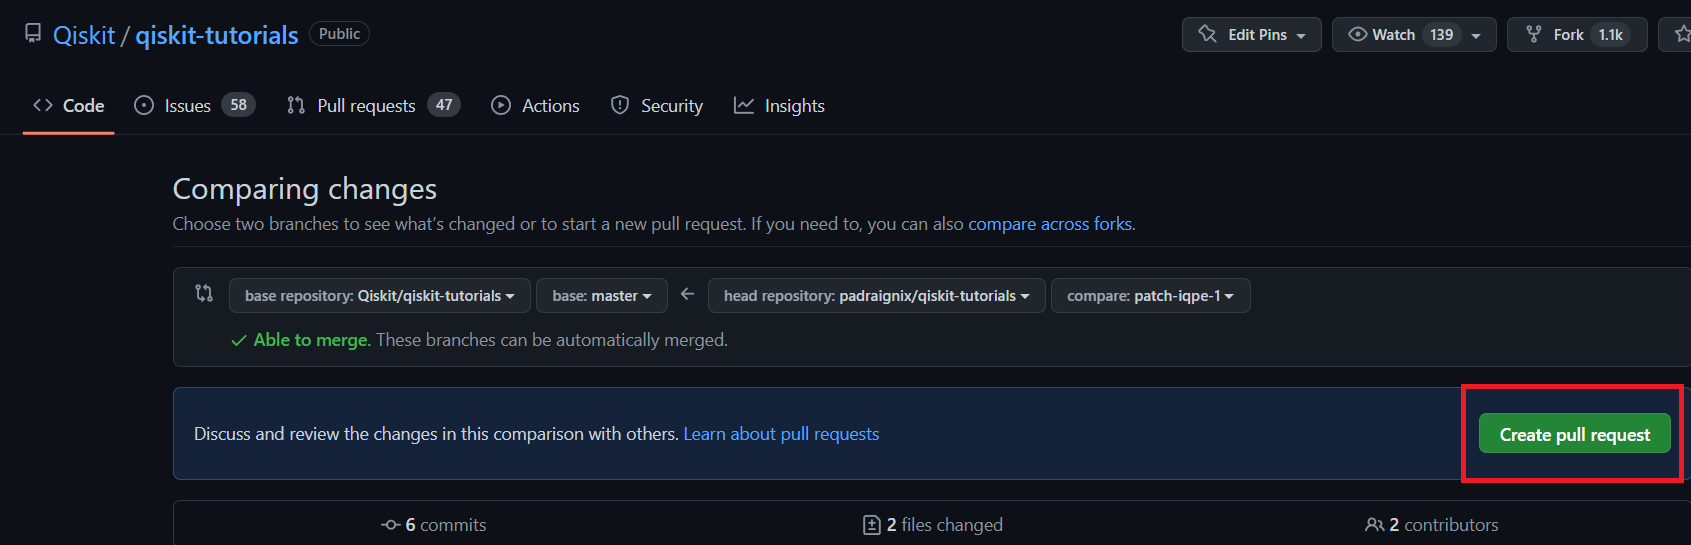
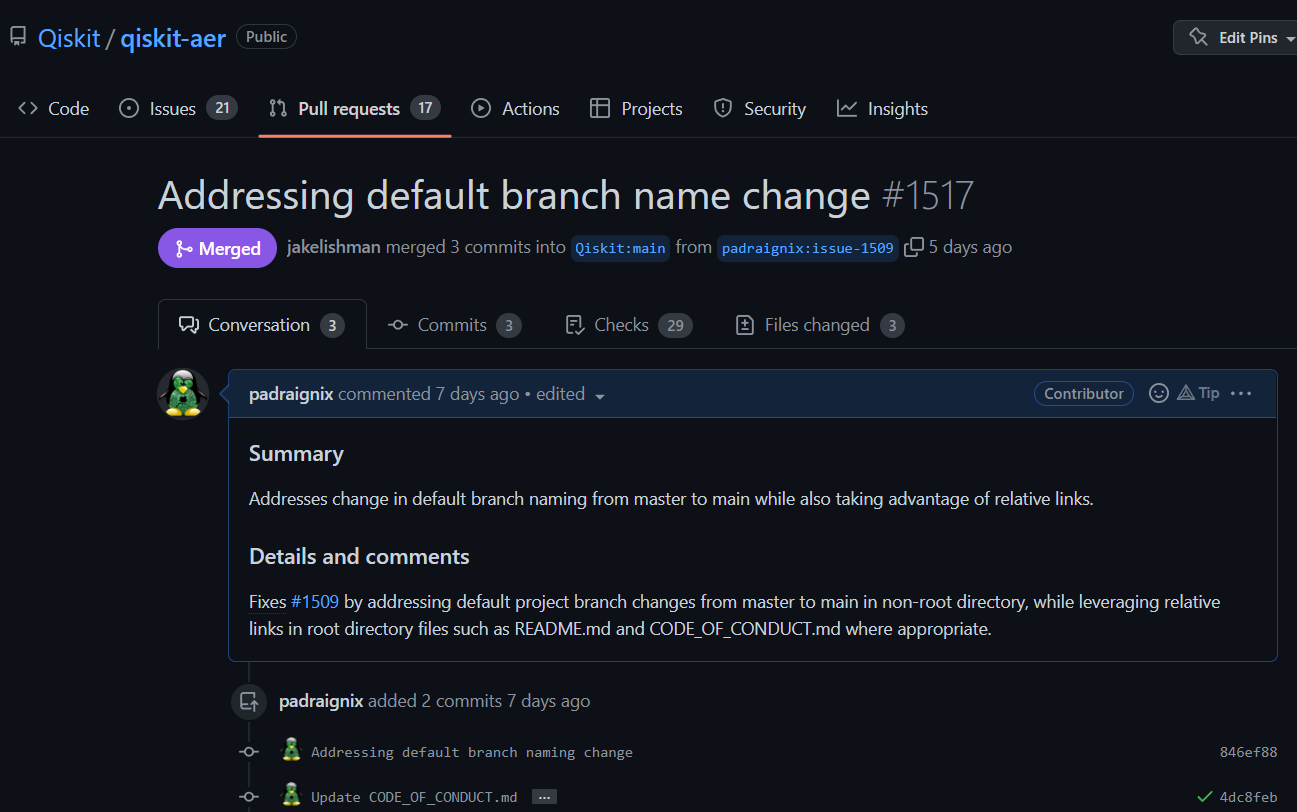
Qiskit pull requests have a format to follow when raising the PR. This help standardize the review process and adding breadcrumbs like “fixes #issuenumber” automatically references the PR on the issue you are working with.
Testing & Pull Request Comments
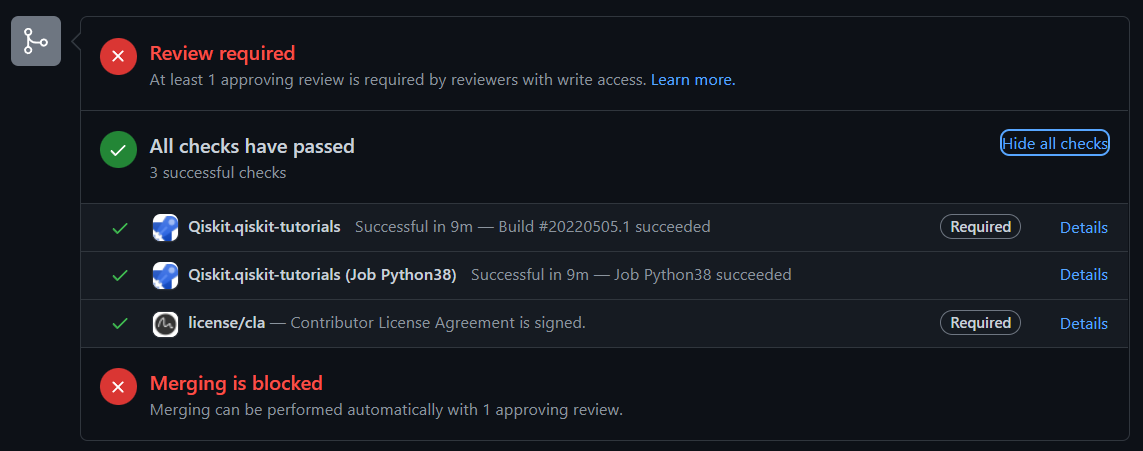
Maintainer of the Qiskit repo will review the request, and depending on the specific Qiskit repository your PR will also go through a testing suite. This helps ensure that proposed changes won’t break any existing functionality. Each project had its own tests, and while the PR I’m talking through on this post is for the qiskit-aer project, let me show you another check list from the qiskit-tutorial project. These are automatically kicked off either on the PR submission (such as in the case of the qiskit-tutorial project) or started after one of the maintainers reviews the proposal (as in the case with qiskit-aer).
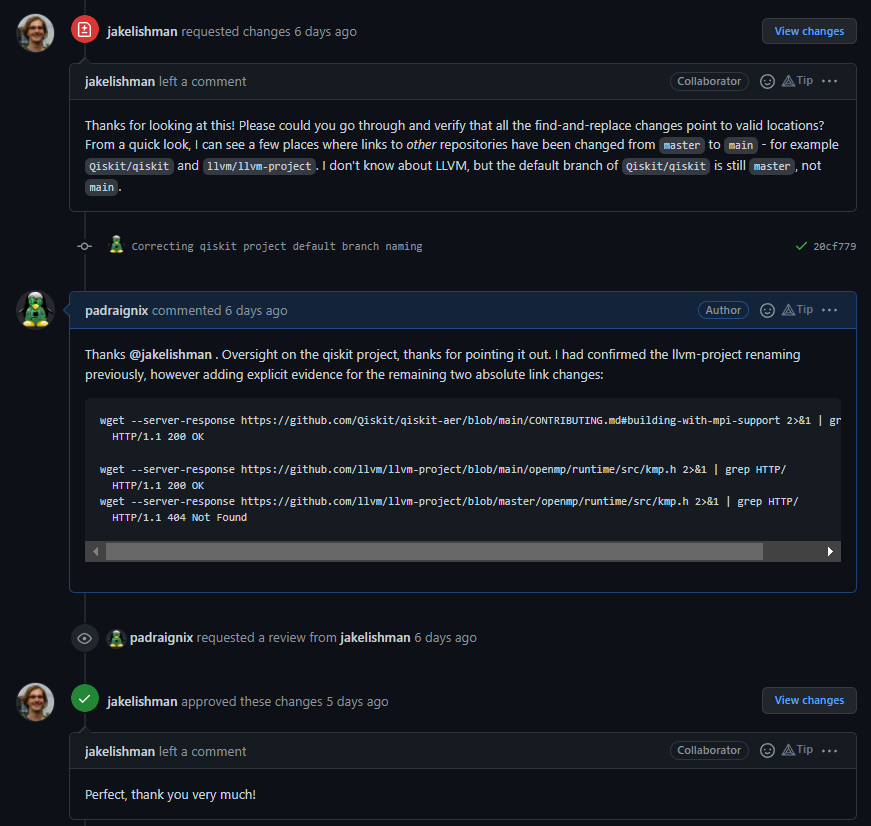
As it turns out I had a small oversight with my proposed changes. While the default branch in qiskit-aer had changed from master to main the main qiskit project had not. Correspondingly the review and comment requested changes from my original submission. I was quickly able to correct the change, and included my own one-off validation testing in the comment to add a measure of confidence. Thankfully this was enough and the proposal was approved!
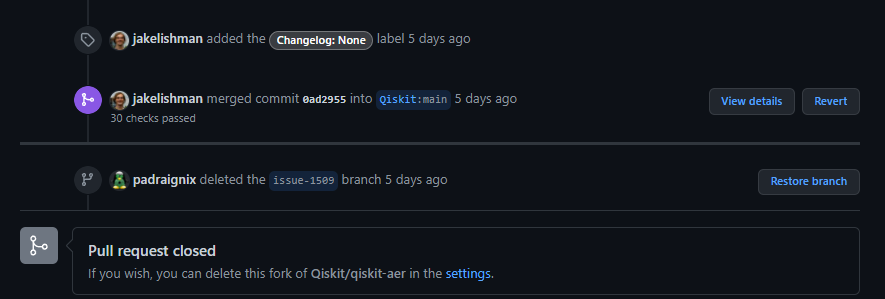
Acceptance, and Merger
With the testing successful, the comments addressed and approved, and the contributor license agreement signed, the only remaining part was for the project maintainers to merge in the code and close up the PR and issue.
Summary
And just like that one of my first code contributions back to Qiskit is complete!

Arguably this wasn’t a huge deployment such as a new feature, or large bugfix, however as I mentioned earlier in the article this was a legitimate issue that impacted me directly as I was trying to build qiskit-aer v11.0 locally. Hopefully with this PR merged others will have a smoother Aer build process and will be able to focus more on implementation than just getting it up and running. That’s how I look at my small contribution and hope it positively impacts future qiskit-aer users.

Time to wrap up this article. Everyone is capable of positively contributing back to the community and hopefully this helped demystify one of the ways that can be accomplished. I hope that anyone reading this now feels more comfortable taking the plunge and go on to open their own pull requests!
Thanks folks, until next time!